Are you ready to upgrade your RV setup with a power system that gives you dependable and efficient energy? Whether an experienced RV enthusiast or a beginner to this mobile lifestyle, understanding how a properly installed 200-amp RV pedestal functions is key to ensuring safety and uninterrupted power supply. This detailed step-by-step guide will aid you through the wiring procedures and provide you with vital safety tips that can be considered along the way and common pitfalls you could avoid. The selection is covered from proper equipment, materials, and learning how to wire something like a pro. So get ready to make your adventures more powerful!
Understanding RV Power Pedestals

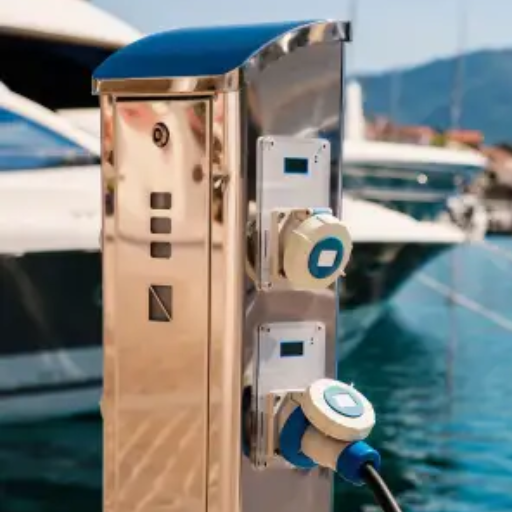
How to install RV power pedestal? The RV power pedestal is an electrical station dedicated to giving power to recreational vehicles. These pedestals are situated in an RV park, campground, or other facility and carry power outlets set for usual RV power connections, usually 30 amp, 50 amp, and sometimes 20 amp. The pedestal forms an unsecured shore power connection to the RV. The user could run any appliance, light, or onboard electrical system without entirely relying on the vehicle battery or generator.
What is an RV Pedestal?
An RV pedestal is a fixed electrical unit that supplies power to recreational vehicles. These pedestals form part of RV parks, campgrounds, and other facilities and offer electrical hookups for their visitors in a reliable yet convenient manner.
A modern RV pedestal usually includes power outlets conforming to certain standards, such as 30 and 50 amps, and sometimes 20-amp ones for lighter requirements. Constructed of weather-resistant materials and safe to operate in that it provides features such as circuit breakers and sometimes surge protection, these pedestals allow RV owners to run their heating, cooling, lighting, and appliances systems on shore power, significantly increasing the comfort of RV life by providing a steady energy source as opposed to having to rely on generators or vehicle batteries.
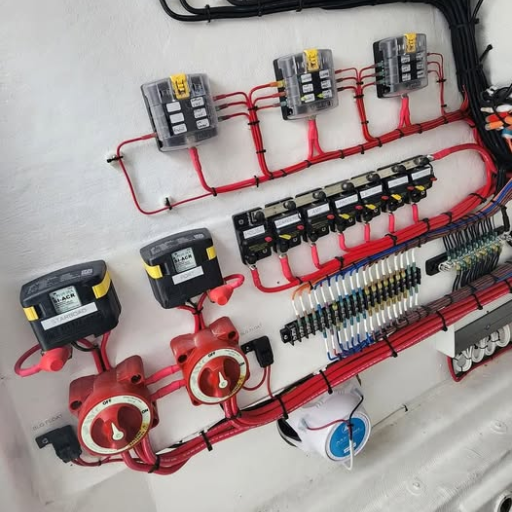
Components of an RV Power Pedestal
The RV power pedestal comprises a few critical components that ensure the safe and efficient power delivery to recreational vehicles. Below are the principal components along with their details:
- Power Outlets
RV power pedestals usually have multiple outlets: 20-amp, 30-amp, and 50-amp receptacles, all meant to cater to various RV power needs. The 20-amp outlets usually accommodate some standard household plugs; 30-amp and 50-amp outlets serve higher-intensity electrical needs inside RVs. These are NEMA-rated outlets, such as NEMA TT-30 for 30 amps and NEMA 14-50 for 50 amps.
- Circuit Breakers
All outlets have circuit breakers, which prevent electrical overload or short circuits that could damage the RV and the pedestal. The circuit breaker is a safety device that switches off the circuit in case of any fault in the electric current, such as a short circuit. Some new pedestals contain advanced breakers that also monitor voltage to maintain the supply at a steady value.
- Surge Protection
The latest designs in RV power pedestals include surge protection to protect the electrical systems of the RV from being affected by power surges, more prominently caused by lightning or sudden variations in strength within the grid. Data released by the RV industry dictates that these power surges will seriously damage appliances in an RV; thus, surge protection is crucial.
- Weatherproof Enclosure
The entire pedestal is housed inside a weather-resistant enclosure made of corrosion-proof stainless steel or heavy-duty plastic. This ensures Ryland wouldn’t have to think twice about the warranty if this outdoor elephant of a tool is left up for a four-season thunderstorm.
- LED Indicator Lights
Nowadays, pedestals often have LED indicators that update their status as the situation changes. For example, a green light means normal power flow, but a red or flashing light may indicate a problem, such as reversed polarity or a grounding issue.
- Metering Systems (Optional)
Some at the top end may have a meter installed to measure actual consumption. The meter may indicate kilowatt-hours (kWh) for reference data for RV park operators and guests.
- Lockable Access Doors
Pedestals may have lockable access panels to prevent unauthorized tampering or use; this is a valuable feature for RV park owners who want to manage use.
- GFCI Outlets
Such outlets are usually provided on 20-amp outlets to give extra protection from electrical shocks. GFCI outlets are even required by electrical codes in several places, thus providing safety for all who work in outdoor settings.
These elements work in tandem to deliver a safe, reliable, and user-friendly power source for RV enthusiasts. Introducing modern features such as surge protection and LED indicators shows that RV power pedestal design is constantly improving, making them a must for comfortable and secure RV camping.
Types of RV Pedestals: 50 Amp vs 200 Amp
When it comes down to it, RV pedestals come in various ways, with 50-amp pedestals for a single RV and 200-amp pedestals for more than one RV or high-demand setups.
|
Parameter |
50 Amp |
200 Amp |
|---|---|---|
|
Capacity |
Single RV |
Multiple RVs |
|
Usage |
Basic needs |
High demand |
|
Appliances |
Limited |
Heavy-duty |
|
Cost |
Lower |
Higher |
|
Setup |
Simple |
Complex |
Planning for Installation

The planning phase needs to be undertaken carefully to ensure a safe and smooth installation process of an RV power pedestal. Begin by determining the electrical demand of the RV to select the proper pedestal type, i.e., 50 Amp or 200 Amp. Check up on local electrical codes and regulations to ensure you work within the safety standards and permitting processes. Choose a location that is conveniently accessible, drains well, and is devoid of any blatant obstructions. Before starting, ensure you have the tools and all materials needed for the installation process, such as wiring and junction boxes. Bringing a certified electrician on board is highly advisable to guarantee the installation meets compliance and reliability criteria.
Assessing Your RV Power Needs
A smooth and efficient electrical setup heavily depends upon your knowledge of the power requirements of the RV. List down all the appliances and devices you wish to use in your RV, such as an air conditioner, a refrigerator, a microwave, and lights; also included could be charging ports for your mobile electronic devices. Consider the wattage for each, which is usually printed on the device label or found in the user manual, and calculate the total wattage required. Do consider if you will use all these items simultaneously, and bear in mind the surge in demand when, for example, your air-conditioning system starts operating.
Consider whether you will need a 30-amp or a 50-amp setup because this further influences your required setup and equipment. A 30-amp setup can handle 3,600 watts, while the 50-amp setup handles about 12,000 watts. Need to know these limits well to have a balanced and quite functional power supply on offer. Also, factor any off-grid power requirements, such as the need for batteries, inverters, and solar panels, into your plan to give yourself added flexibility while traveling. Taking such steps will provide you with a customized power system friendly to your RV lifestyle.
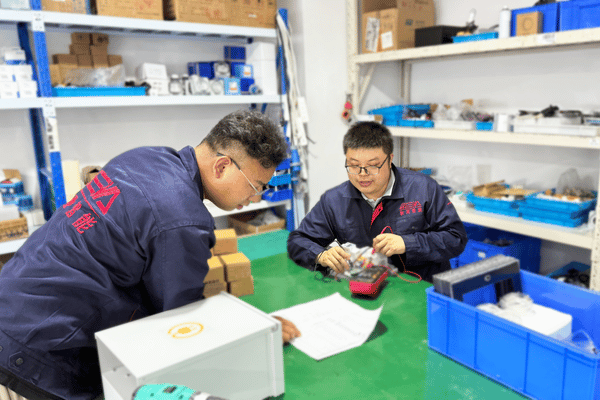
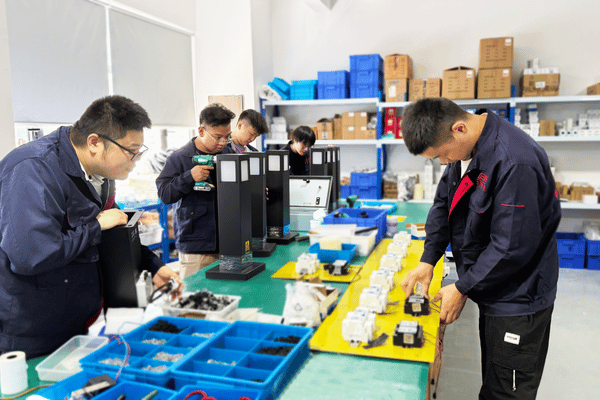
Tools Required for Installing an RV Pedestal
Installing an RV pedestal requires some equipment to do so safely and efficiently. The following tools and materials are essential for the process:
- Shovel or Post Hole Digger – To create the hole in which the pedestal will be secured. Usually, the hole is around 2-3 feet deep to stabilize the pedestal.
- Concrete Mix – Used to hold the pedestal in place with excellent resistance to long-term shifting or tipping.
- Measuring Tape- To measure distances properly, such as the hole depth and height of the pedestal.
- Level- To level the pedestal so that operations can be appropriately performed.
- Screwdrivers and Socket Wrench Set—This set is for tightening different bolts and screws to the pedestal itself and the electrical connections.
- Wire Strippers and Cutters- To strip and cut wires cleanly. Electricity is enough of a hazard without shoddy wire connections.
- Voltage Tester or Multimeter- To confirm the voltage level and the electrical connections work safely and correctly.
- Electrical Tape and Cable Ties- To secure the wiring and add an element of safety and neatness to the installation.
- Drills and Drill Bits- For drilling holes wherever necessary to attach components of the pedestal or wiring.
- Electrical Conduit Pipe and Bender- To protect the wires so that they become underground and attain electrical safety. The proper way of bending ensures neat routing of the cables.
- Protective Gear—This will include gloves, safety glasses, and insulated tools for safely working on electrical components.
- Local Electrical Code Handbook—This entails all the guidelines and standards required in your area to ensure that you have installed the pedestal according to law.
Each tool ensures the RV pedestal is installed safely, stably, and complies with standards. Also, for any high-voltage wiring or detailed electrical connections, always consult a licensed electrician so that everything remains safe, meets regional codes, and complies.
Safety Precautions Before Starting
These safety measures must be followed to prevent accidents, meet compliance criteria, and ensure a safe working environment while commencing the installation of an RV pedestal.
- Turn Off the Power Supply
Always ensure that the main power supply of the site for installation is off. This step ensures that there is no risk of electrical shock. Use a voltage tester to ascertain that no active current flows on the wires if possible.
- Personal Protective Equipment (PPE)
Wear all necessary PPE, such as insulating gloves, safety glasses, steel-toed boots, or anything needed to protect yourself from electrical hazards, sharp tools, or objects falling on you. If the worksite requires it, wear a hard hat.
- Inspect All Tools and Equipment
Test and inspect all tools and electrical components for damage or wear before using them. Power tools ought to be either grounded or double-insulated to prevent electrical hazards.
- Follow Local Electrical Codes
Study local electrical code requirements before installation. For instance, the National Electrical Code in the United States of America provides stringent requirements for wiring and protective equipment used in outdoor installations. Failure to adhere to such requirements may result in hazards or legal penalties.
- Proper Grounding
Ensure that the RV pedestal has proper grounding from electrical surges or faults. Specifically, the NEC requires that grounding conductors be tested and secured adequately.
- Clear the Work Area
Make sure nothing blocks or obstructs the area around the installation site. A clear platform will remove class malefactors and increase efficiency.
- Check Weather Conditions
Do not ever start working with electricity outdoors if it rains or there is a storm. Water greatly intensifies the possibility of electrical shock.
- Consult Electrical Load Requirements
Verify that the pedestal will handle the load it is designed to serve. For instance, most RV pedestals are designed for 30-amp or 50-amp service connections. Overload could cause them to heat up and thus become fire hazards.
- Emergency Preparedness
Have a Class C extinguisher for fighting electrical fires within reach, a first-aid kit ready, and a plan in case anything goes wrong.
If these safety precautions are taken before working on any electrical installation, the risks of working on electrical installations can be minimized, ensuring a safer and more efficient installation process.
Step-by-Step Installation Process

- Turn Off Power
At this stage, turn off the power to the installation area. Use a voltage tester to ensure no power in the circuit.
- Plan the Layout
Evaluate and plan the installation of wires, outlets, or devices. Verify dimensions and check if the layout complies with local electrical codes.
- Install Electrical Boxes
Based on the layout, mount the appropriate electrical boxes on the walls, ceilings, or other locations.
- Run Wiring
Carefully run the cables through the boxes and connectors, ensuring they are never bent sharply and the insulation is not damaged.
- Connect Wires
Connect wires to their respective terminals, typically according to color codes, such as black for hot, white for neutral, and green for ground.
- Secure Outlets or Devices
Securely mount outlets, switches, or other devices into the electrical boxes with a firm fit.
- Test Connections
Ensure all connections are accurate and use a continuity tester before applying power to the system.
- Restore Power and Test
Please restore the power to test and ensure the new installation works correctly and safely.
Crews operate with a plan to reduce human error, and the installation supports safety and code compliance.
Preparing the Site and Digging the Trench
Site selection and trench preparation ensure a successful installation of underground electrical systems. The initial procedure involves surveying the site and setting the trench’s course according to local laws and safety codes. A check ensures no utility lines are within the digging area by having the local utility marking service do its work. With everything cleared, excavation begins, and the excavation tool used will be a function of the soil and the size of the project. Try to have the trench consistent in depth and width, permitting the conduit or wiring per the project specifications. Keep this neat and free of boulders, and protect it from washouts until installation begins.
Wiring the RV Power Pedestal to the Main Panel
To wire the RV power pedestal, start by ensuring all power sources to the main panel are turned off at the main circuit breaker. Then, a conduit is run through which the correct gauge wire (determined by amps and distance) runs from the panel to the pedestal. Generally, 6-gauge wire is run for an RV hookup rated at 50 amps, while 10-gauge wire can be used for a 30-amp power hookup. Properly secure the conduit to avoid any physical damage to the wiring.
Most importantly, the hot wires (black or red) at the main panel go to the breaker attached for the correct amperage. The neutral is attached to the neutral bus bar, while the ground (green or bare copper) is connected to the ground bus bar. Check the tightness of the connections. Wire the hot, neutral, and ground wires at the RV power pedestal to their respective terminals. Double-check the connections before restoring power to test.
Installing the RV Pedestal
While installing an RV pedestal, a few common problems occur, and troubleshooting may help you address those issues effectively. Recheck all wire connections if there is no power at the pedestal after installation. All the wires must be tightly fixed to avoid or disallow any incorrect connection at their respective terminals. Many a time, a loose wire is the reason. Also, verify if the circuit breaker supplying power to the pedestal is switched on and functional.
Check the voltages with a multimeter if the power supply is not steady or fluctuating. Voltage fluctuation could mean bad wiring or a bad situation at the primary power source. Also, verify that all terminal screws are tight, but do not overtighten them, as overtightening can damage thin wires.
Lastly, ensure the pedestal and electrical components comply with local codes and standards. Following these heavy-duty guidelines would certainly help ensure reliable and safe operation for your RV power pedestal. If the problem gets complicated, it would be advisable to call a licensed electrician.
Common Challenges and Troubleshooting

- Power Loss at the Pedestal
Cause: Tripped breaker or a loose wire.
Solution: Check for a tripped breaker in the pedestal panel and reset it if necessary. Also, check to ascertain that the connections are tight.
- Power Surges or Voltage Drops
Cause: Circuit overloading or an extreme load on the power supply.
Solution: Stabilize or decrease the number of devices drawing power simultaneously. If you continue experiencing problems, measure the voltage with a multimeter and report the issue to the park management if necessary.
- Burned or Destroyed Plugs
Cause: Corrosion, overheating, or wrong insertion of the plug.
Solution: Check the plug for damage and replace it if needed. Only plug in when a clean and firm connection is guaranteed.
- No Power Is Coming from The Pedestal
Cause: Either faulty components in the pedestal or upstream issues in the electrical system.
Solution: Inform the park staff or a professional electrician so the pedestal may be inspected and repaired.
- Breaker Trips Often
Cause: Overloading of the circuit or a short within the RV wiring.
Solution: Decrease the electrical load and inspect the RV wiring for faults. If the problem persists, seek professional help.
Systematically dealing with these problems will ensure the safety and reliability of your RV’s power source. Always put safety first and switch off the power before inspecting or repairing.
Identifying Wiring Issues
The wiring inside your RV can cause numerous electrical issues, such as flickering lights and complete power outages. Recognize signs such as a burnt smell from the outlet, exposed or frayed wires, and electrical components not behaving consistently.
Such signs often indicate the presence of damaged or old wiring. A possible solution is to test the circuits with a multimeter to check continuity and voltage. It is always best to advise if another will get involved and complicate the situation if unsure. Today, step-by-step troubleshooting guides can be found online, and the proximity of an expert who handles RV electrical systems can be located on the internet with the help of search engines like Google. Always tackle wiring issues systematically and keep safety at the forefront: disconnect power before inspecting or repairing.
Dealing with Power Fluctuations
Power fluctuations in an RV can usually be attributed to uneven campground voltage, faulty appliances, or a problematic power converter. To address this, start by confirming the source of the power supply. Employ a surge protector or a voltage meter to check if the incoming electrical supply is steady and within the safe limits generally 108 to 132 volts for most RVs). Next, inspect the breaker panel and fuses for visible damage or loose connections.
Disconnect appliances, considering the fluctuating signals, one at a time, to isolate the culprit. An extreme protective measure that ensures your RV stays protected from any spike or dip could be the installation of an automatic voltage regulator or energy management system. Always adhere to the manufacturer’s instructions and seek professional advice in case of persistent troubles.
What to Do If You Need to Hire a Professional
When you hire an expert to work on electrical problems inside your RV, it’s best to do your homework to ensure you are dealing with a professional. Start searching online for a licensed RV electrician or technician. Check among Google Reviews, Yelp, or specific RV forums for customer experiences and find yourself a reputable service provider. An ideal candidate must be certified, insured, and experienced with electrical RV systems.
If you are ready to hire a technician, get more than one estimate at least. Compare prices and services offered. Specify your problem and ask how they would fix it. Transparency is crucial for understanding the work they propose to do. They should at least offer warranties on parts and labor to protect your investment and keep your mind at ease. If you can’t find a local service provider, your RV manufacturer may be able to suggest a candidate.
Reference Sources
- Approved, Listed, And Field Evaluated – Requirements For Low Voltage Electrical Equipment Used For Power Distribution And Motor Control
- Authors: T. Sauve, Ken Sellars
- Publication Date: September 26, 2022
- Journal: 2022 IEEE IAS Petroleum and Chemical Industry Technical Conference (PCIC)
- Citation Token: (Sauve & Sellars, 2022, pp. 303–309)
Summary:
- Objective: This paper examines the various laws, regulations, and codes applicable to the approval of low-voltage electrical power distribution and motor control equipment, which is relevant for installing RV power pedestals.
- Methodology: The authors discuss the requirements for electrical equipment approval, including safety standards and the implications of using unapproved equipment.
- Key Findings: The paper clarifies the importance of equipment approval to ensure safety and compliance with regulations, which is crucial for installations like RV power pedestals. It addresses common questions regarding equipment approval processes and the consequences of non-compliant equipment.
- Detection of Icing and Calculation of Sag of Transmission Line Through Computer Vision
- Authors: P. Shivani et al.
- Publication Date: August 1, 2020
- Journal: 2020 Third International Conference on Smart Systems and Inventive Technology (ICSSIT)
- Citation Token: (Shivani et al., 2020, pp. 689–694)
Summary:
- Objective: This study focuses on monitoring overhead transmission lines, which can provide insights into installing and maintaining electrical systems, including RV power pedestals.
- Methodology: The authors propose a vision system that uses a single camera to monitor transmission lines for icing and sag, which are critical factors in ensuring the reliability of electrical installations.
- Key Findings: The system successfully detects icing and calculates sag, which can inform safety precautions during installing electrical systems, including RV power pedestals.
- Extend the range of AC Ammeter and AC Voltmeter
- Authors: Shahrukh Tanekhan et al.
- Publication Date: March 16, 2025
- Journal: International Scientific Journal of Engineering and Management
- Citation Token: (Tanekhan et al., 2025)
Summary:
- Objective: This report explores Current Transformers (CTs) and Potential Transformers (PTs) to extend the range of standard ammeters and voltmeters, which is relevant for measuring electrical parameters while installing RV power pedestals.
- Methodology: The authors discuss the operational principles of CTs and PTs, their applications in high-voltage systems, and the necessary precautions for their practical use.
- Key Findings: Using CTs and PTs enhances safety and accuracy in electrical measurements, which is crucial for ensuring RV power pedestals’ proper installation and functioning.
- Top RV Power Pedestals Manufacturer And Supplier In China
Frequently Asked Questions (FAQs)
How to Install an RV Power Pedestal for 50 Amp RV Outlets?
First, to install an RV power pedestal for a 50-amp RV outlet, ensure you have the necessary permits and follow local building codes. Begin by selecting a suitable location for the pedestal near your RV sites. Install a ground rod at the pedestal to ensure proper grounding. Run 4-gauge cable from your main breaker to the pedestal, connecting the two hot wires (L1 and L2) to the 50-amp outlet. Lastly, secure all connections and test the power supply before using it with your RV.
What Is the Process for Pedestal Installation of 30-amp and 20 20-amp outlets?
The pedestal installation process for 30-amp and 20-amp outlets begins with selecting the appropriate location and ensuring it complies with local electrical work regulations. Use a 3-wire configuration for the 30-amp outlet and a 2-wire configuration for the 20-amp outlet. Connect the feeder wires to the respective outlets, ensuring you have the correct gauge cable for the amperage. Finally, check all wiring connections and install a main breaker to protect the circuit.
How Do You Ground an RV Power Pedestal?
Grounding an RV power pedestal is crucial for safety. You should drive a grounding electrode, typically a ground rod, into the ground near the pedestal. Connect a grounding wire from the ground rod to the pedestal’s grounding terminal. Ensure that the ground and neutral wires are bonded adequately at the main panel and that all connections are secure to prevent electrical hazards.
Can You Install an RV Power Pedestal with Direct Burial Cable?
Yes, you can install an RV power pedestal using direct burial cable. This type of cable is designed for underground installation without additional conduit. Make sure to bury the cable at the appropriate depth, typically 24 inches, and follow all local codes regarding electrical installations. Connect the direct burial cable to your pedestal, ensuring proper connections to the 50—or 30-amp outlets as required.
What Are the Electrical Wiring Requirements for RV Power Pedestals?
Electrical wiring requirements for RV power pedestals depend on the outlets’ amperage. For a 50-amp RV outlet, a 4-wire configuration (two hot wires, one neutral, and one ground) is necessary. For a 30-amp outlet, a 3-wire setup is used, which includes two hot wires and one ground. Always use the appropriate gauge cable to handle the demand factor and ensure all connections are correctly made to avoid overloads.
How to Choose the Right Amp Service for Your RV Site?
Choosing the exemplary amp service for your RV site depends on the power requirements of your RV’s appliances. If you have multiple high-demand appliances, a 50-amp service is recommended. For smaller RVs or those with fewer appliances, a 30-amp or even a 20-amp service may suffice. Consider your RV’s total load and ensure your pedestal installation accommodates the necessary amperage.
Do You Need a 200-Amp Meter for Multiple RV Sites?
A 200-amp meter may be necessary for multiple RV sites to handle the combined load efficiently. This setup allows for a main breaker to distribute power to several 50-amp and 30-amp hookups. Ensure a qualified installer performs the electrical work to meet local codes and safety standards.
What Is a Split Phase System in RV Power Pedestal Installation?
A split-phase system in RV power pedestal installation involves using two 120-volt hot wires (L1 and L2) that provide 240 volts for larger appliances. This system is commonly used for 50-amp RV outlets, allowing for the efficient operation of high-demand devices. Ensure proper installation of the circuit breaker and connections to support this setup.
How to Use an Adapter for 30-Amp Hookups?
Connect an adapter for 30-amp hookups to your RV’s power inlet and plug it into the 30-amp outlet at the pedestal. Ensure the adapter is rated for the amperage and voltage of your RV and the pedestal. This allows you to connect to different power sources while ensuring safety and compatibility.


